Moving into a new home is exciting, but one of the essential services to prioritize is your internet connection. Whether you are a remote worker, a student, a parent managing smart devices, or simply someone who enjoys streaming TV and browsing online, internet connectivity is vital. Setting up the internet at a new residence in Canada involves several steps, from choosing a provider to activating your service. This guide walks you through everything you need to know to ensure a smooth and hassle-free setup.
1. Check Which Internet Providers Service Your New Address
Not all internet service providers (ISPs) operate in every part of Canada. Urban centers such as Toronto, Vancouver, and Montreal have multiple ISPs to choose from, while rural and remote areas may be limited. Use postal code lookup tools on websites like Findhub.ca to see a list of available providers based on your new address. Some of the most common ISPs include:
- Rogers
- Bell
- Telus
- Shaw (now part of Rogers in Western Canada)
- Videotron (Quebec)
- Xplore (rural areas)
- Smaller local providers like Coextro, Cannet, and Diallog
Keep in mind that even large providers may not service every building or neighbourhood. This step helps you avoid choosing a provider only to learn later they are not available at your specific address.
2. Choose the Right Internet Plan for Your Needs
Next, determine what kind of internet service fits your lifestyle. Ask yourself the following:
- Do you work from home or require video conferencing?
- How many users and devices will be connected simultaneously?
- Do you stream in HD or 4K regularly?
- Is gaming or smart home automation a priority?
Based on your answers, consider these types of internet plans:
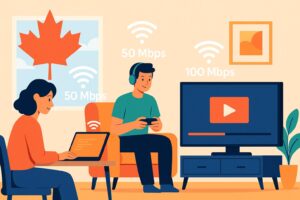
- Basic Plans: Speeds up to 50 Mbps, suitable for light browsing, email, and social media.
- Mid-Tier Plans: 75–150 Mbps, ideal for households with multiple users streaming and working remotely.
- High-Speed Plans: 300+ Mbps, great for heavy users, 4K streaming, large downloads, and online gaming.
- Gigabit Plans: 1 Gbps or higher, best for smart homes, ultra-fast needs, or shared living spaces.
3. Compare Plans and Prices
Once you know your speed requirements, compare available plans from the ISPs servicing your area. Some comparison platforms like Findhub.ca let you filter plans by speed, price, contract length, and data caps. Things to look for:
- Promotional offers: Many providers offer discounted prices for the first 12 months.
- No-contract options: If you prefer flexibility, choose a monthly plan without a long-term commitment.
- Unlimited data: Essential for families, streamers, and remote workers who need consistent access without overage fees.
- Installation and equipment fees: Some providers waive these charges during promotions, saving you up to $100 or more.
4. Schedule Installation or Self-Installation
Once you choose a provider and sign up for a plan, you will need to set a date to activate your service. Depending on your address and the provider, you will either:
- Schedule a professional installation: A technician will visit your home to set up the modem, wiring, and connections.
- Opt for self-installation: Many providers mail a modem and guide you through setup with online instructions or apps.
Professional installation is often required for homes that have never had that ISP before or for fiber-optic connections. Self-install is quicker and ideal for plug-and-play cable or DSL setups.
5. Prepare Your Home Before Installation
To ensure a smooth setup, take these steps in advance:
- Locate coaxial or telephone jacks: These may be in living rooms, bedrooms, or basements. Make sure the technician has access.
- Clear access points: Clear furniture or obstacles near the modem setup area.
- Have your router ready: If you are using your own router, make sure it is compatible and on hand for configuration.
Also consider the best placement for your Wi-Fi router. Central locations with minimal obstructions tend to give the best performance across your home.
6. Set Up Wi-Fi and Connect Devices
After the modem is installed and activated, it is time to set up your Wi-Fi. If using a combo modem-router unit from your ISP, they will typically set up the Wi-Fi name (SSID) and password for you. If using a separate router:
- Connect the modem to the router using an Ethernet cable.
- Access the router’s admin panel (usually by typing 192.168.1.1 or 192.168.0.1 into a browser).
- Configure your Wi-Fi SSID and secure password.
- Enable WPA2 or WPA3 encryption for security.
Now connect your laptops, phones, smart TVs, and any IoT devices to the network using the new credentials.
7. Test Your Internet Speed
Use a service like Fast.com or Speedtest.net to ensure you are getting the speeds you are paying for. Conduct tests during different times of the day and in multiple rooms to assess coverage and consistency.
If your results are significantly below the expected speeds, contact your provider’s technical support. They may offer troubleshooting steps, firmware updates, or recommend equipment upgrades.
8. Troubleshooting Common Setup Issues
Even with professional support, some issues may arise. Common problems include:
- No internet connection: Check that all cables are securely connected. Restart your modem and router.
- Weak Wi-Fi signal: Move the router to a more central location or consider using a mesh network or signal boosters.
- Frequent disconnects: May indicate interference, outdated firmware, or an issue with the ISP’s local infrastructure.
Document error messages or connectivity patterns before contacting support to speed up diagnosis.
9. Moving Your Existing Internet Plan
If you already have an ISP and are happy with your service, consider transferring your plan to your new address. Most providers allow this, and it could save time and setup fees. Make sure to:
- Notify your provider at least two weeks in advance.
- Confirm if your current plan is available at the new location.
- Schedule installation or modem delivery for your move-in date.
Some ISPs may waive fees or offer discounts for moving customers, so be sure to ask.
10. Canceling Your Old Internet Plan
If switching providers, remember to cancel your old plan to avoid overlapping bills. Consider the following:
- Give proper notice: Most require 30 days’ notice to avoid penalties.
- Return rental equipment: Modems or routers must be returned, or you could be charged.
- Pay final bill: Ensure your account is closed in good standing.
Take a moment to confirm that autopay or pre-authorized payments are removed from your bank account once the cancellation is confirmed.
Conclusion: Enjoy a Seamless Online Experience in Your New Home
Setting up internet at your new home in Canada does not have to be stressful. By checking availability, selecting the right plan, and preparing your home, you can get connected quickly and smoothly. Whether you are working from home, streaming, gaming, or just browsing, a reliable connection is a must-have in today’s digital age.